Let's Build Photo Booth for Touch Bar: Part 2
December 8, 2023 | Previous part |
This part of the macOS Touch Bar programming tutorial focuses on capturing the video output as a photo and saving it to an app-specific directory within ~/Pictures.
We’ll add a Camera Capture button to the UI, which will save the photo to your local machine. This part requires additional user permissions and a complicated conversion between internal macOS image types, which we thankfully abstract away in a method.
Set up the project
If you’re following along from Part 1, I recommend branching the project in Git. Or if you’ve cloned the project in
GitHub,
![]() checkout the
checkout the part2 branch. I’m going to write those steps out here since I always forget how to do it:
git fetch
git branch -v -a
git switch part2
With the fresh branch in place, open Xcode and let’s update some project settings:
- Open the project target, go to Signing & Capabilities > App Sandbox > File Access and change the Permission & Access for Pictures Folder to Read/Write.
- In the project, we will be editing the
TouchBarView,Camera, andCameraPreviewfiles. Create the following Swift file in the same directory:PhotoCaptureDelegate.
PhotoCaptureDelegate.swift
Let’s begin with the new file for this part of the tutorial, PhotoCaptureDelegate. But let’s do this iteratively, focusing on implementing one function to write the video output as an image file:
PhotoCaptureDelegate.swift
// visit peterarsenault.industries
import AVFoundation
import SwiftUI
import CoreImage

public class PhotoCaptureDelegate: NSObject, AVCapturePhotoCaptureDelegate {
    var filter: String?

    init(filter: String?) {
        self.filter = filter
        super.init()
    }

    public func photoOutput(_ output: AVCapturePhotoOutput, didFinishProcessingPhoto photo: AVCapturePhoto, error: Error?) {
        guard let imageData = photo.fileDataRepresentation() else { return }

        let picturesDir = FileManager.default.urls(for: .picturesDirectory, in: .userDomainMask).first!
        let imagesPath = picturesDir.appendingPathComponent("TouchBarPhotoBooth")

        do
        {
            try FileManager.default.createDirectory(atPath: imagesPath.path, withIntermediateDirectories: true, attributes: nil)
            let timestamp = NSDate().timeIntervalSince1970
            let date = NSDate(timeIntervalSince1970:timestamp)

            let formatter = DateFormatter()
            formatter.dateFormat = "yyyy-MM-dd-HHmmss"
            let humanReadableTimeStamp = formatter.string(from: date as Date)

            let fileURL = imagesPath.appendingPathComponent("Selfie\(humanReadableTimeStamp).jpg")
            try? imageData.write(to: fileURL)
        }
        catch let error as NSError {
            NSLog("Unable to create directory \(error.debugDescription)")
        }
    }
}
This PhotoCaptureDelegate class conforms to the AVCapturePhotoCaptureDelegate protocol, which means it implements this photoOutput method:
public func photoOutput(_ output: AVCapturePhotoOutput,
    didFinishProcessingPhoto photo: AVCapturePhoto, error: Error?)
In our case, this method:
- Turns the output of the photo capture into data.
- Tries to create a directory in
~/Pictures/calledTouchBarPhotoBooth. - Writes the photo capture data to that directory as
Selfie{yyyy-MM-dd-HHmmss}.jpg
We will return to this file later.
Camera.swift
Now that we’ve created the photo capture delegate, let’s add a method to the Camera class to capture a photo:
var photoDelegate: PhotoCaptureDelegate?
@Published var filter: String? = ""

func capturePhoto() {
    photoDelegate = PhotoCaptureDelegate(filter: filter)
    let photoSettings = AVCapturePhotoSettings()
    output.capturePhoto(with: photoSettings,
                    delegate: photoDelegate!)
}
This function captures a still image from the video output and sends it to the photo capture delegate class, where we wrote the image processing instructions (e.g., save the output to a file).
The capturePhoto method requires photo settings as a parameter, but we are sending nothing but the default. You can use these settings to specify photo dimensions, quality, format, and other information (such as newer iOS features like Live Photos and Photo Depth).
Here’s the final updated class for this part of the tutorial:
Camera.swift
/*
See LICENSE folder for this sample’s licensing information.

Abstract:
A view that provides a preview of the content the camera captures.
*/
import AVFoundation

@MainActor
class Camera: ObservableObject {
    var photoDelegate: PhotoCaptureDelegate?
    @Published var filter: String? = ""

    internal let output = AVCapturePhotoOutput()
    internal let session = AVCaptureSession()

    private(set) var alert = false
    private(set) var states = States.unknown
    private(set) var isSetup = false
    private(set) var isAuthorized = false
    private(set) var isRunning = false

    enum States: @unchecked Sendable {
        case unknown
        case unauthorized
        case failed
        case running
        case stopped
    }

    lazy var preview: (String) -> CameraPreview = { incomingFilter in
        CameraPreview(session: self.session, filter: incomingFilter)
    }

    func capturePhoto() {
        photoDelegate = PhotoCaptureDelegate(filter: filter)
        let photoSettings = AVCapturePhotoSettings()
        output.capturePhoto(with: photoSettings, delegate: photoDelegate!)
    }

    func start() async {
        guard await authorize() else {
            self.states = .unauthorized
            return
        }
        do {
            try setup()
            startSession()
        } catch {
            states = .failed
        }
    }

    internal func authorize() async -> Bool {
        let status = AVCaptureDevice.authorizationStatus(for: .video)
        isAuthorized = status == .authorized
        if status == .notDetermined {
            isAuthorized = await AVCaptureDevice.requestAccess(for: .video)
        }
        return isAuthorized
    }

    internal func setup() throws {
        guard !isSetup else { return }

        session.beginConfiguration()
        session.sessionPreset = .high
        guard let captureDevice = AVCaptureDevice.default(for: .video) else { return }
        guard let input = try? AVCaptureDeviceInput(device: captureDevice) else { return }
        session.addInput(input)
        session.addOutput(output)
        session.commitConfiguration()
        isSetup = true
    }

    internal func startSession() {
        Task.detached(priority: .userInitiated) {
            guard await !self.isRunning else { return }
            self.session.startRunning()
            await MainActor.run {
                self.isRunning = self.session.isRunning
                self.states = .running
            }
        }
    }
}
TouchBarView.swift
We have updated the Camera object to support capturing still images from video output and defined the PhotoCaptureDelegate to save the still image to a file, now let’s update the UI to include a button to perform this action.

Add the camera button before your other buttons on the Touch Bar:
Button(action: {
    camera.filter = previewPhotoEffect
    camera.capturePhoto()
}, label: {
    Image(systemName: "camera")
}).touchBarItemPrincipal(true)
        .controlSize(.large)
Here’s the final updated class for this part of the tutorial:
TouchBarView.swift
// visit peterarsenault.industries
import SwiftUI

struct TouchBarView: View {
    var camera: Camera
    @Binding var previewPhotoEffect: String
    @State var w: CGFloat?
    @State var h: CGFloat?

    var body: some View {
        ScrollView(.horizontal){
            HStack(){
                Button(action: {
                    camera.filter = previewPhotoEffect
                    camera.capturePhoto()
                }, label: {
                    Image(systemName: "camera")
                }).touchBarItemPrincipal(true)
                        .controlSize(.large)

                Button(action: {
                    previewPhotoEffect = "CISepiaTone"
                }, label: {
                    camera.preview("CISepiaTone")
                }).frame(width:w, height:h)
                    .controlSize(.large)

                Button(action: {
                    previewPhotoEffect = "CIColorInvert"
                }, label: {
                    camera.preview("CIColorInvert")
                }).frame(width:w, height:h)
                    .controlSize(.large)

                Button(action: {
                    previewPhotoEffect = "CIThermal"
                }, label: {
                    camera.preview("CIThermal")
                }).frame(width:w, height:h)
                    .controlSize(.large)

                Button(action: {
                    previewPhotoEffect = "CIDotScreen"
                }, label: {
                    camera.preview("CIDotScreen")
                }).frame(width:w, height:h)
                    .controlSize(.large)

                Button(action: {
                    previewPhotoEffect = "CIPixellate"
                }, label: {
                    camera.preview("CIPixellate")
                }).frame(width:w, height:h)
                    .controlSize(.large)

                Button(action: {
                    previewPhotoEffect = "CIPointillize"
                }, label: {
                    camera.preview("CIPointillize")
                }).frame(width:w, height:h)
                    .controlSize(.large)

                Button(action: {
                    previewPhotoEffect = "CIGaborGradients"
                }, label: {
                    camera.preview("CIGaborGradients")
                }).frame(width:w, height:h)
                    .controlSize(.large)

                Button(action: {
                    previewPhotoEffect = "CIComicEffect"
                }, label: {
                    camera.preview("CIComicEffect")
                }).frame(width:w, height:h)
                    .controlSize(.large)

                Button(action: {
                    previewPhotoEffect = "CIColorMonochrome"
                }, label: {
                    camera.preview("CIColorMonochrome")
                }).frame(width:w, height:h)
                    .controlSize(.large)

                Button(action: {
                    previewPhotoEffect = "CIMorphologyGradient"
                }, label: {
                    camera.preview("CIMorphologyGradient")
                }).frame(width:w, height:h)
                    .controlSize(.large)
            }.frame(minHeight: 0, maxHeight: .greatestFiniteMagnitude)

        }
    }
}
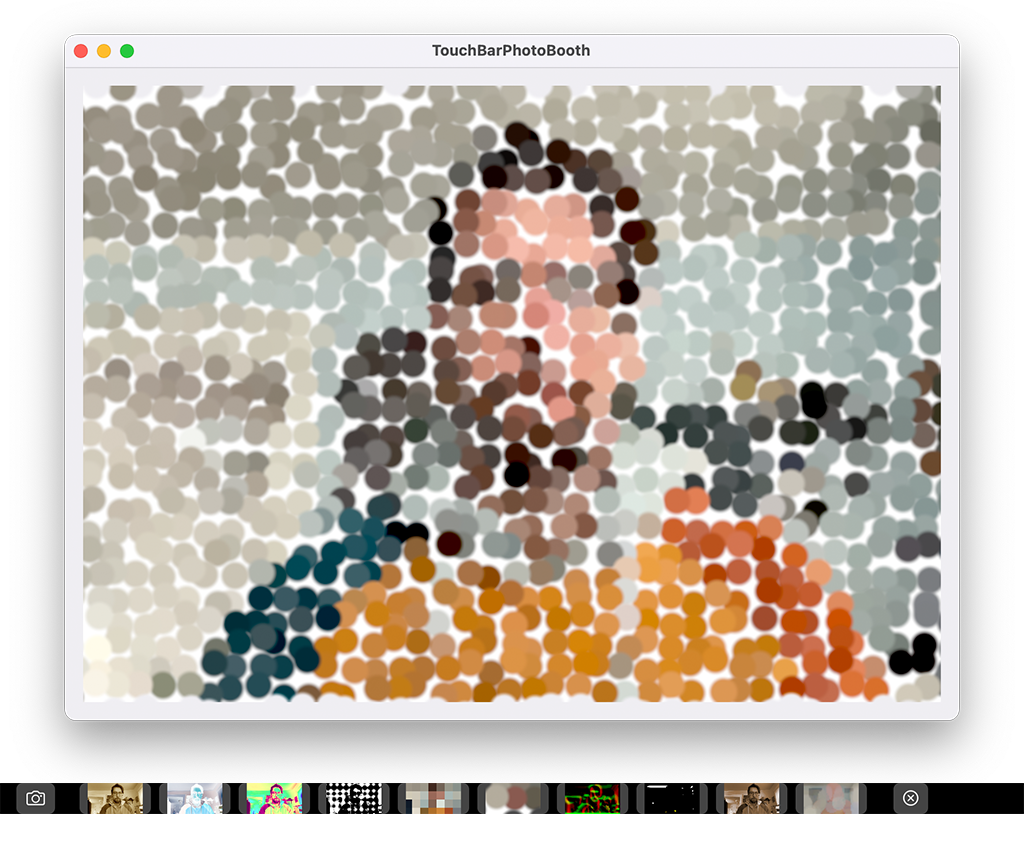
Mid-tutorial Photo Session!!
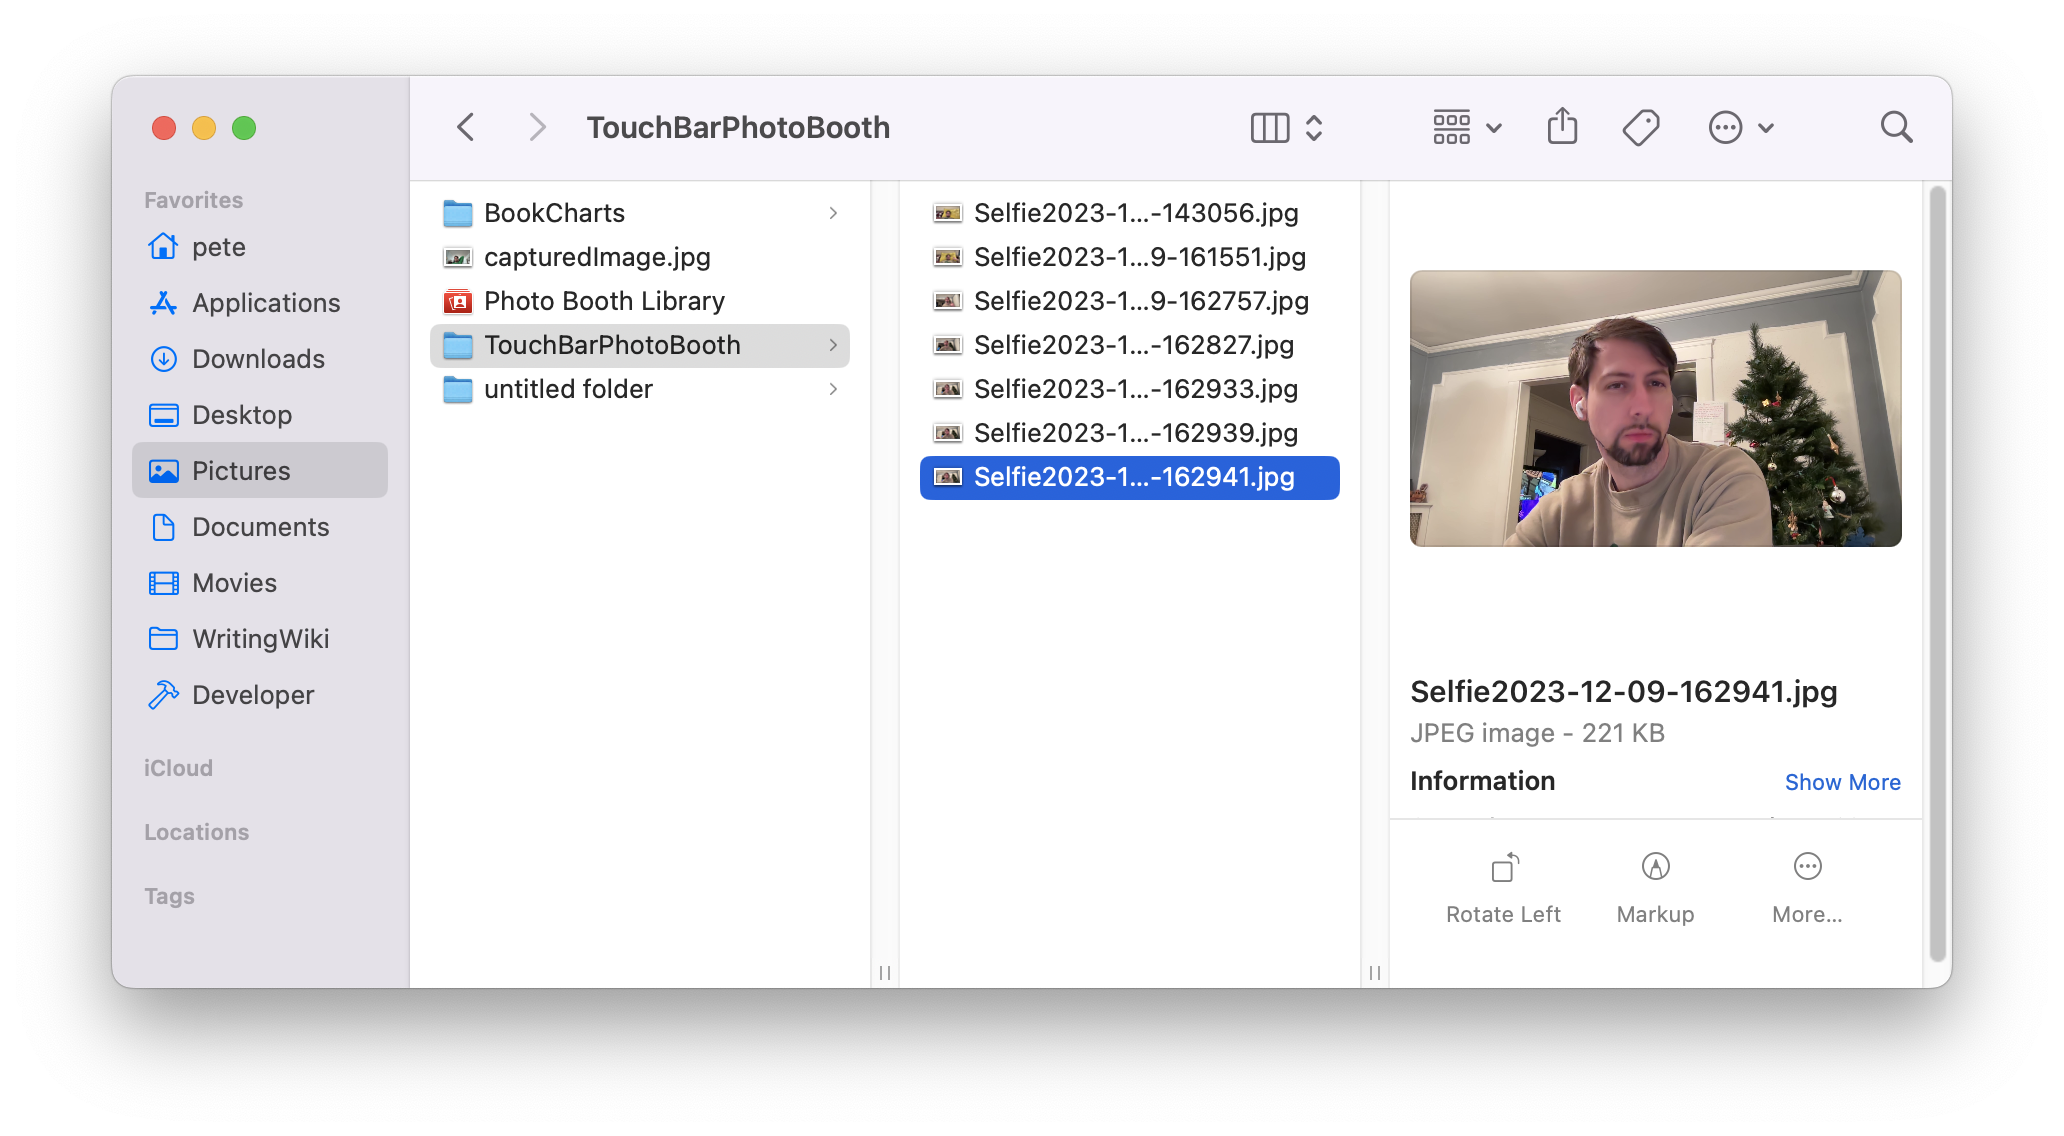
At this stage, you can run the app and capture photos which are saved to your ~/Pictures/TouchBarPhotoBooth directory.
However, while the preview layer shows a photo effect, the output file doesn’t have the effect applied! We need to tell the PhotoCaptureDelegate to apply the filter to the output file before saving it. But it’s not so easy..
Return to PhotoCaptureDelegate.swift
Returning to PhotoCaptureDelegate, we need a function that applies the filter to the photo output.
Why don’t we have this already? Because the filter was applied on top of the video output in a previewLayer. So while we were seeing the filter, it wasn’t integrated with the footage.
In fact, take a look at this application where the camera permission was denied by the user:
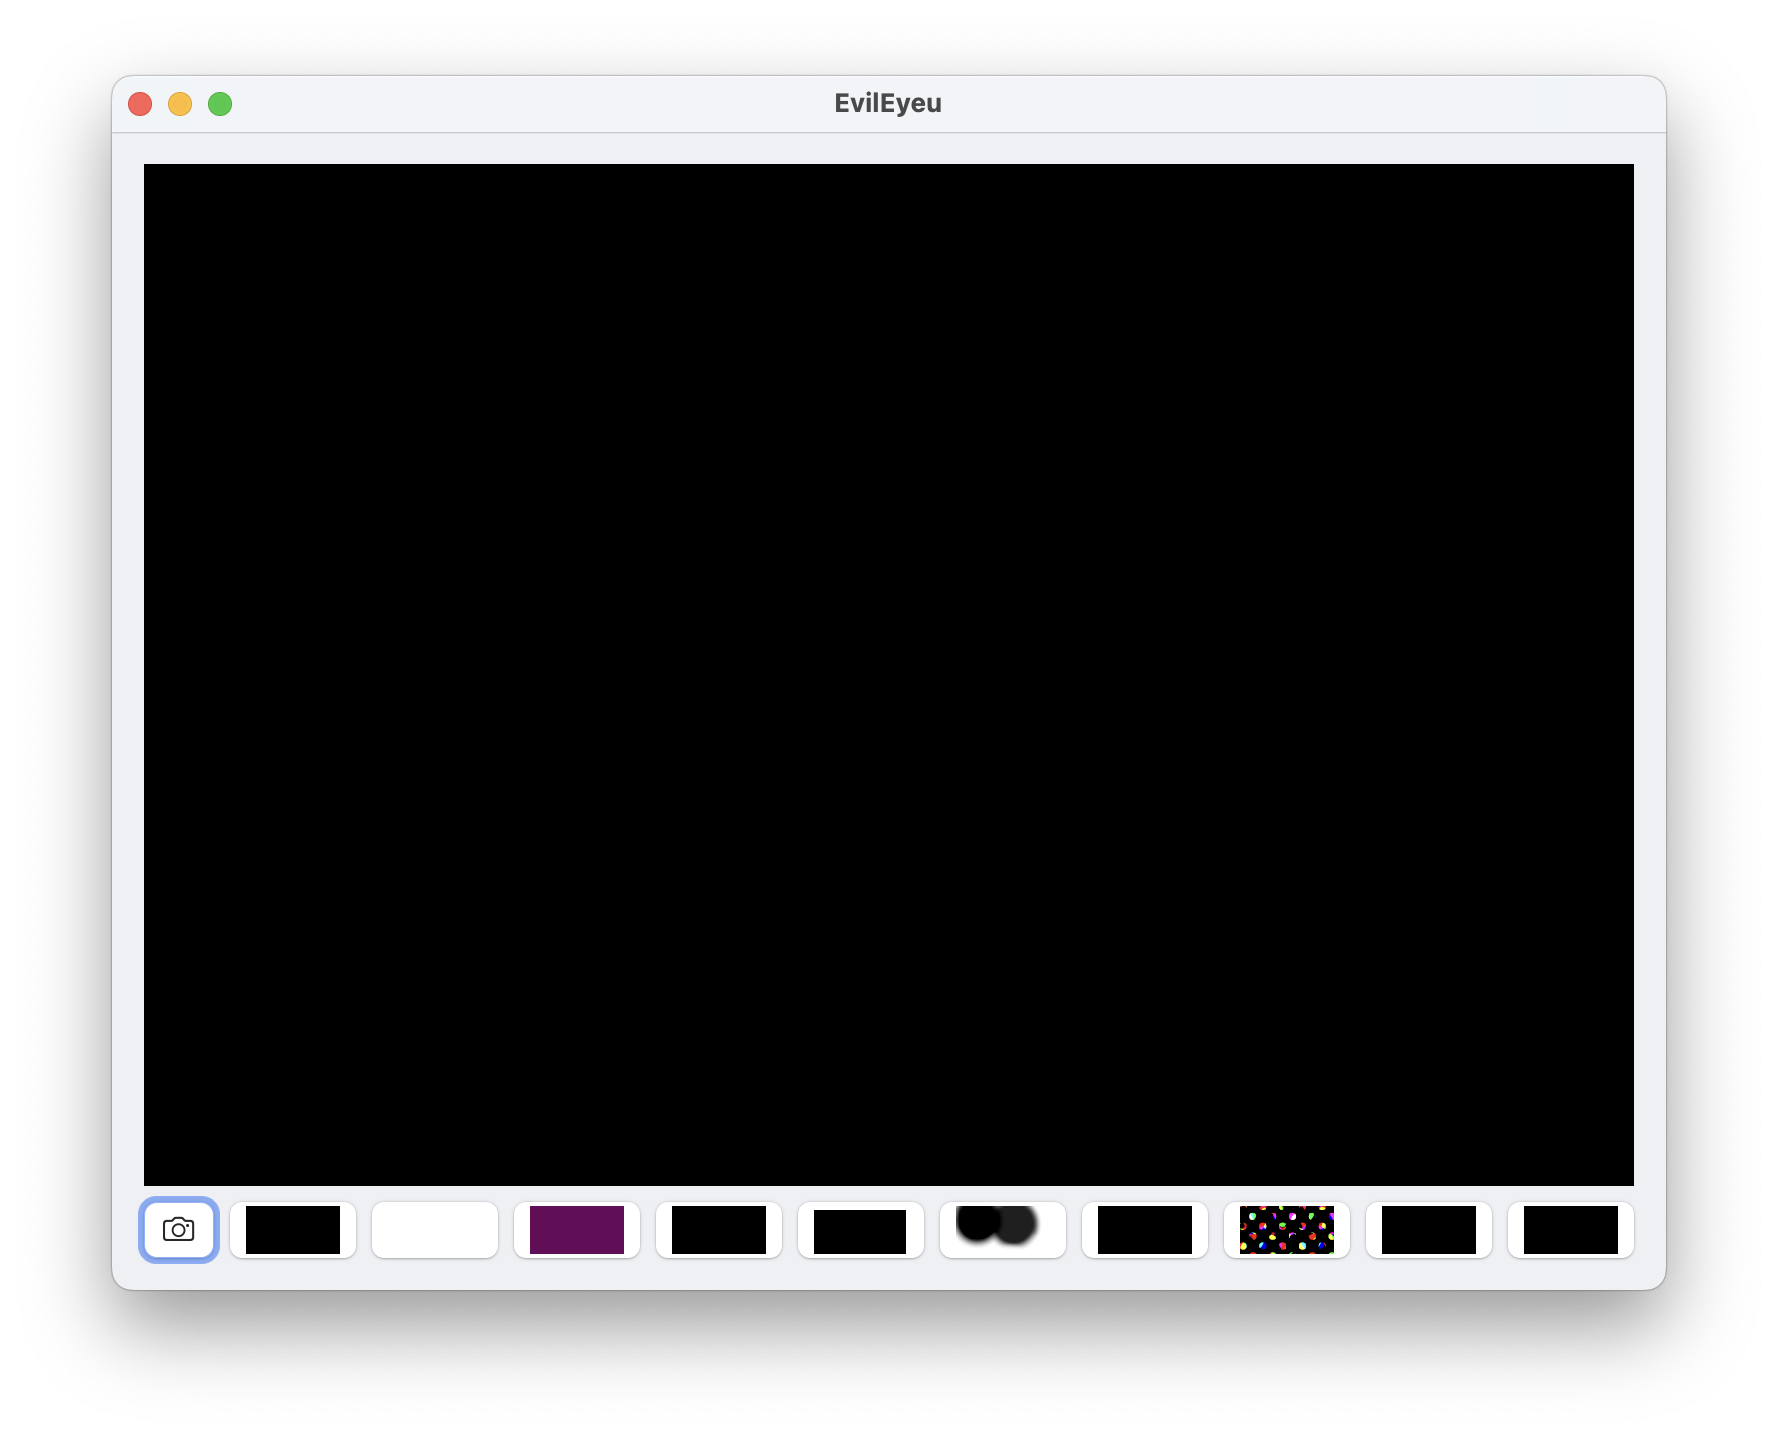 The Preview Layers are in place, each containing some transparency and awaiting the video capture output to be displayed underneath.
The question to ask is, “Is there a method that lets you add a CIFilter to an AVCapturePhoto object or data?”
Not directly. But you can convert data -> NSImage -> CIImage, apply the filter to the CIImage, convert back to NSImage -> data in TIFF format -> data in specified format. Kind of painful. Then call the function from your photoOutput method, specifying the imageData and filter, and change the try? file.write() statement from imageData to filteredImageData.
Here’s the final updated class for this part of the tutorial:
PhotoCaptureDelegate.swift
// visit peterarsenault.industries
import AVFoundation
import SwiftUI
import CoreImage

public class PhotoCaptureDelegate: NSObject, AVCapturePhotoCaptureDelegate {
    var filter: String?

    init(filter: String?) {
        self.filter = filter
        super.init()
    }

    func convertImageDataToFilteredImageData(data: Data, filter: String?) -> Data? {
        let image = NSImage(data: data)
        guard let oldciImage = CIImage(data: image!.tiffRepresentation!) else {
            fatalError("Could not convert NSImage to CIImage.")
        }

        // init with a non-intrusive filter
        var f = CIFilter(name: "CIMedianFilter")

        if (filter != ""){
            // set filter to user-supplied filter from Touch Bar.
            f = CIFilter(name: filter!)
        }

        f!.setValue(oldciImage, forKey: kCIInputImageKey)

        guard let outputCIImage = f?.outputImage else {
            fatalError("Could not get output CIImage from filter.")
        }

        // Convert CIImage to NSImage
        let rep = NSCIImageRep(ciImage: outputCIImage)
        let nsImage = NSImage(size: rep.size)
        nsImage.addRepresentation(rep)

        // Convert NSImage to Data in TIFF format
        guard let tiffData = nsImage.tiffRepresentation else {
            fatalError("Could not get TIFF representation of NSImage.")
        }

        // Create an NSBitmapImageRep from the TIFF data
        guard let bitmapImageRep = NSBitmapImageRep(data: tiffData) else {
            fatalError("Could not create NSBitmapImageRep from TIFF data.")
        }

        // Specify the desired image format (e.g., JPEG)
        let format = NSBitmapImageRep.FileType.jpeg
        let properties: [NSBitmapImageRep.PropertyKey: Any] = [:]

        // Convert NSBitmapImageRep to Data in the specified format
        guard let imageData = bitmapImageRep.representation(using: format, properties: properties) else {
            fatalError("Could not convert NSBitmapImageRep to Data.")
        }

        return imageData
    }

    public func photoOutput(_ output: AVCapturePhotoOutput, didFinishProcessingPhoto photo: AVCapturePhoto, error: Error?) {
        print("Finished processing photo.")
        guard let imageData = photo.fileDataRepresentation() else { return }
        NSSound(named: "apple-camera-sound")?.play()
        guard let filteredImageData = convertImageDataToFilteredImageData(data: imageData, filter: filter) else { return }

        let picturesDir = FileManager.default.urls(for: .picturesDirectory, in: .userDomainMask).first!
        let imagesPath = picturesDir.appendingPathComponent("TouchBarPhotoBooth")

        do
        {
            try FileManager.default.createDirectory(atPath: imagesPath.path, withIntermediateDirectories: true, attributes: nil)
            let timestamp = NSDate().timeIntervalSince1970
            let date = NSDate(timeIntervalSince1970:timestamp)

            let formatter = DateFormatter()
            formatter.dateFormat = "yyyy-MM-dd-HHmmss"
            let humanReadableTimeStamp = formatter.string(from: date as Date)

            let fileURL = imagesPath.appendingPathComponent("Selfie\(humanReadableTimeStamp).jpg")
            try? filteredImageData.write(to: fileURL)
        }
        catch let error as NSError
        {
            NSLog("Unable to create directory \(error.debugDescription)")
        }
    }
}
There’s one other change to the photoOutput method that I added:
NSSound(named: "apple-camera-sound")?.play()
You know it wouldn’t be Photo Booth without the iconic Apple camera sound! If you didn’t clone the project from the GitHub, feel free to download the file
here
![]() and add it into your project bundle. Cliiiick.
and add it into your project bundle. Cliiiick.
Wrapping up
In this part of the tutorial, we edited the project to allow saving images to the local computer in the user’s Pictures directory, and learned how to apply a filter to an image before it’s saved to disk.
We’re definitely shifting away from the Touch Bar because the interesting points of the project mainly involve the camera. There isn’t a ton of good documentation available for macOS cameras. Most questions and chatter is UIKit-based. But since Apple has been pushing the Continuity Camera thing, where you can view iPhone output on Mac, I think there are a lot of exciting opportunities with this technology on the Mac.
If I get to a Part 3, it’ll either be about the extensive CIFilter customizations, or applying all this technology to iOS: instead of the Touch Bar, everything would be for iPhone.